Getting Started
If you are new to Eclipse Streamsheets, this section offers a quick introduction to help you understand some basic principles. In this step-by-step guide we will build an App, which is meant to quickly illustrate how to generate, send and receive data with Streamsheets. More specifically, we will create data in one Streamsheet, continuously send it to the internal MQTT Broker and this way produce a data stream which we will then receive in another Streamsheet.
Let´s get started!
Step 1: Create an App
After logging in, you are taken to the App Dashboard which lists all Apps you have access to. To create your first App, look to the bottom-right corner and identify the “Add” button (it is the “plus”). Click it and choose a meaningful name for your App, e.g. “Great Start” or “Cats and Dogs”. The option “No Consumer” is pre-selected and means that we will create an App which does not have an input data stream connected to it. This is fine for now because, first, we have to create some data.
Step 2: Generate Data
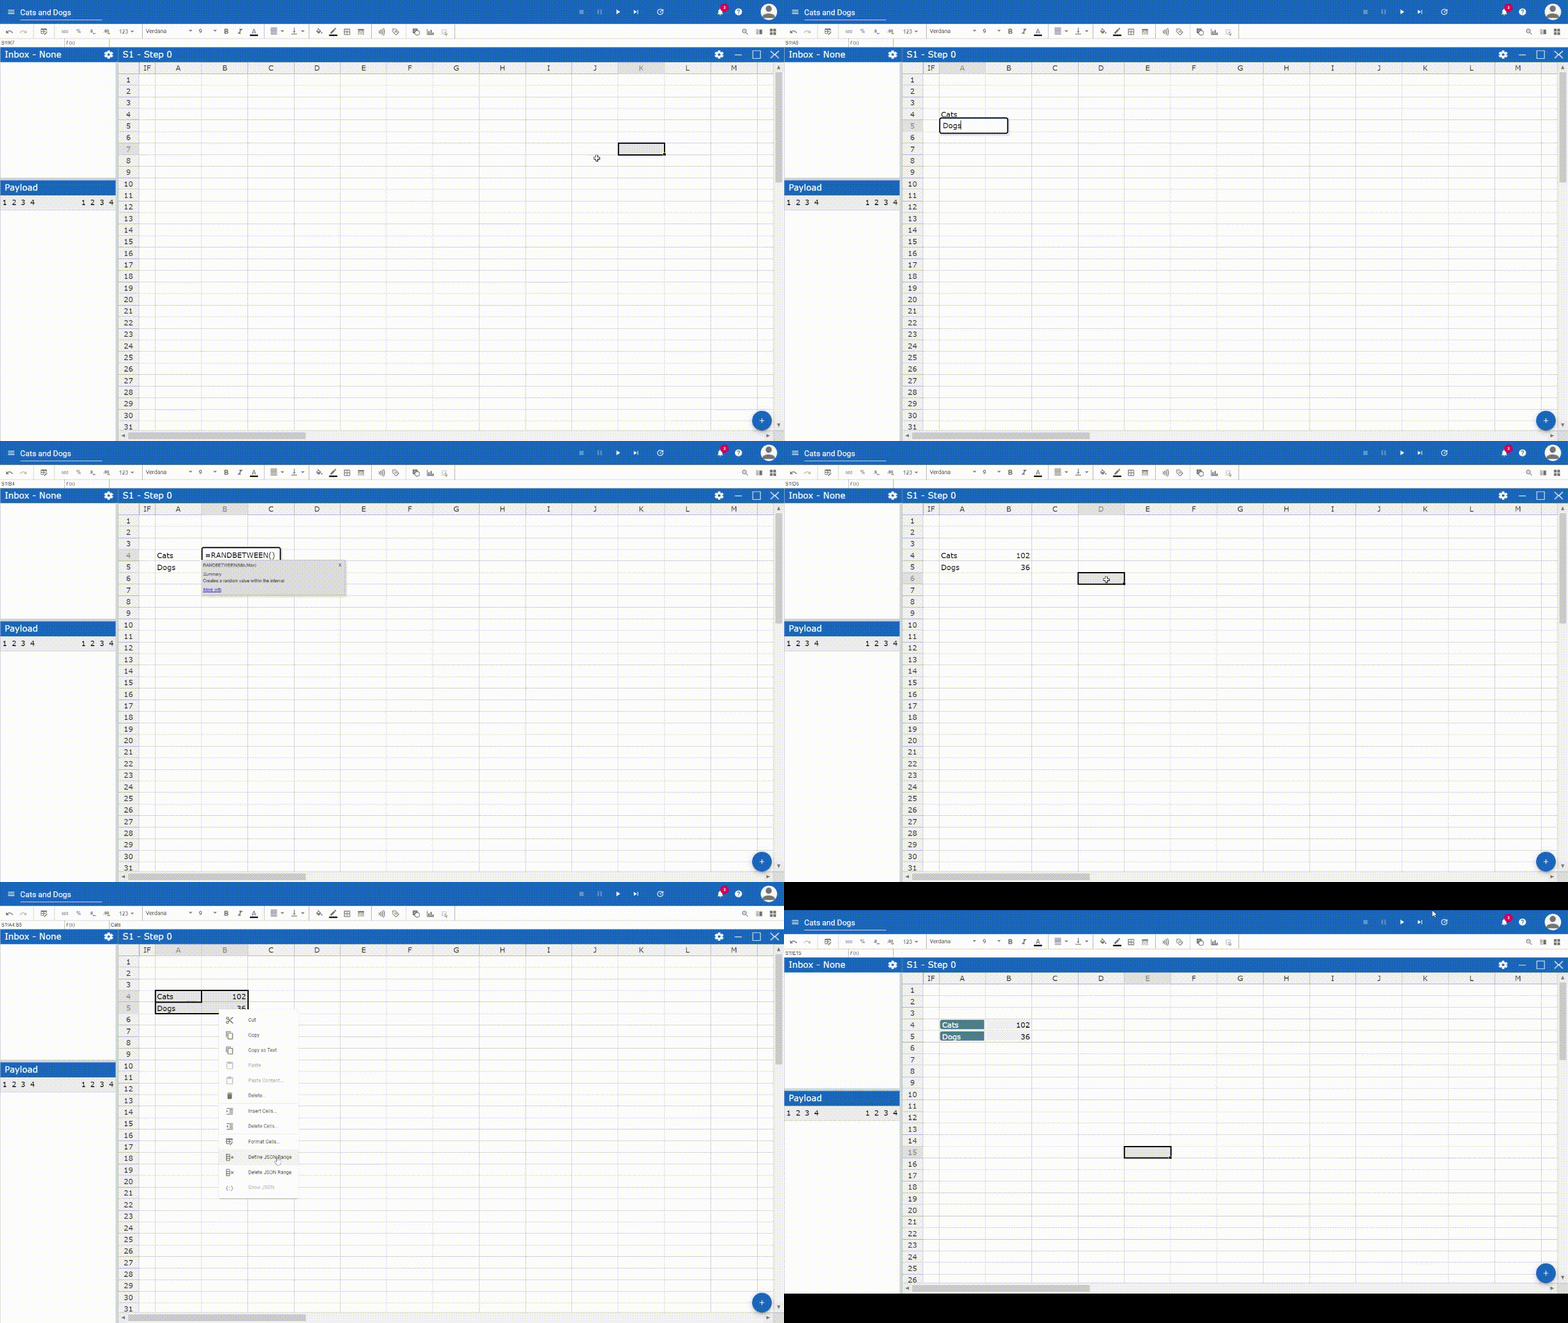
Since we do not have a real data streams connected to our application yet, we simulate some to work with. A simple way to do this is to use the function RANDBETWEEN. It creates random values between a minimum and a maximum. Let´s create two values, one beneath the other and name them. Write the names left of the values, e.g. “Cats” and “Dogs”. Then, select all four cells, right-click and define them as a JSON Range. A JSON is essentially a number of key-value pairs in which the keys can be thought of as the names for the respective values
Now, this cell range is not only a range in the sheet but also a JSON
object which is continuously built with every calculation step of the
sheet.
To send these JSON objects and this way create an outgoing data stream,
we need Step 3.
Step 3: Create a Consumer and Producer
At this point a small theoretical lesson about Streamsheets is helpful:
To get data into a sheet or send data from a sheet, connections need to
be defined. We call these connections Streams.
Streams always consist of two parts, a Connector and Consumer or a
Connector and a Producer. You can also think of them as two layers in
which Connectors form the foundation that Consumers and Producers are
based on.
Connectors hold the general information, such as the Host URL, to
connect Streamsheets to the outside world. Consumers and Producers, on
the other hand, further specify the input (Consumer) and output streams
(Producer).
All three Stream resources are defined in the "Stream" Dashboard.
This step is optional. Default streams for the internal MQTT Broker are already set. We still encourage you to try and set up your own streams. Please go back to the "Apps" Dashboard and select the "Streams" Tab.
You can either use the existing MQTT Connector or create a new one. To send the simulated data via MQTT we need an outgoing Stream, thus we have to set up a Producer. Select the MQTT_Connector and add a new Producer by clicking on the "+"" button next to "Producer". Further settings are optional.
As we are already in the Streams menu, let´s quickly create a Consumer. Again, click the "+"" button (this time next to "Consumers"). This time we have to specify a topic as an additional parameter, e.g. “catsanddogs”.
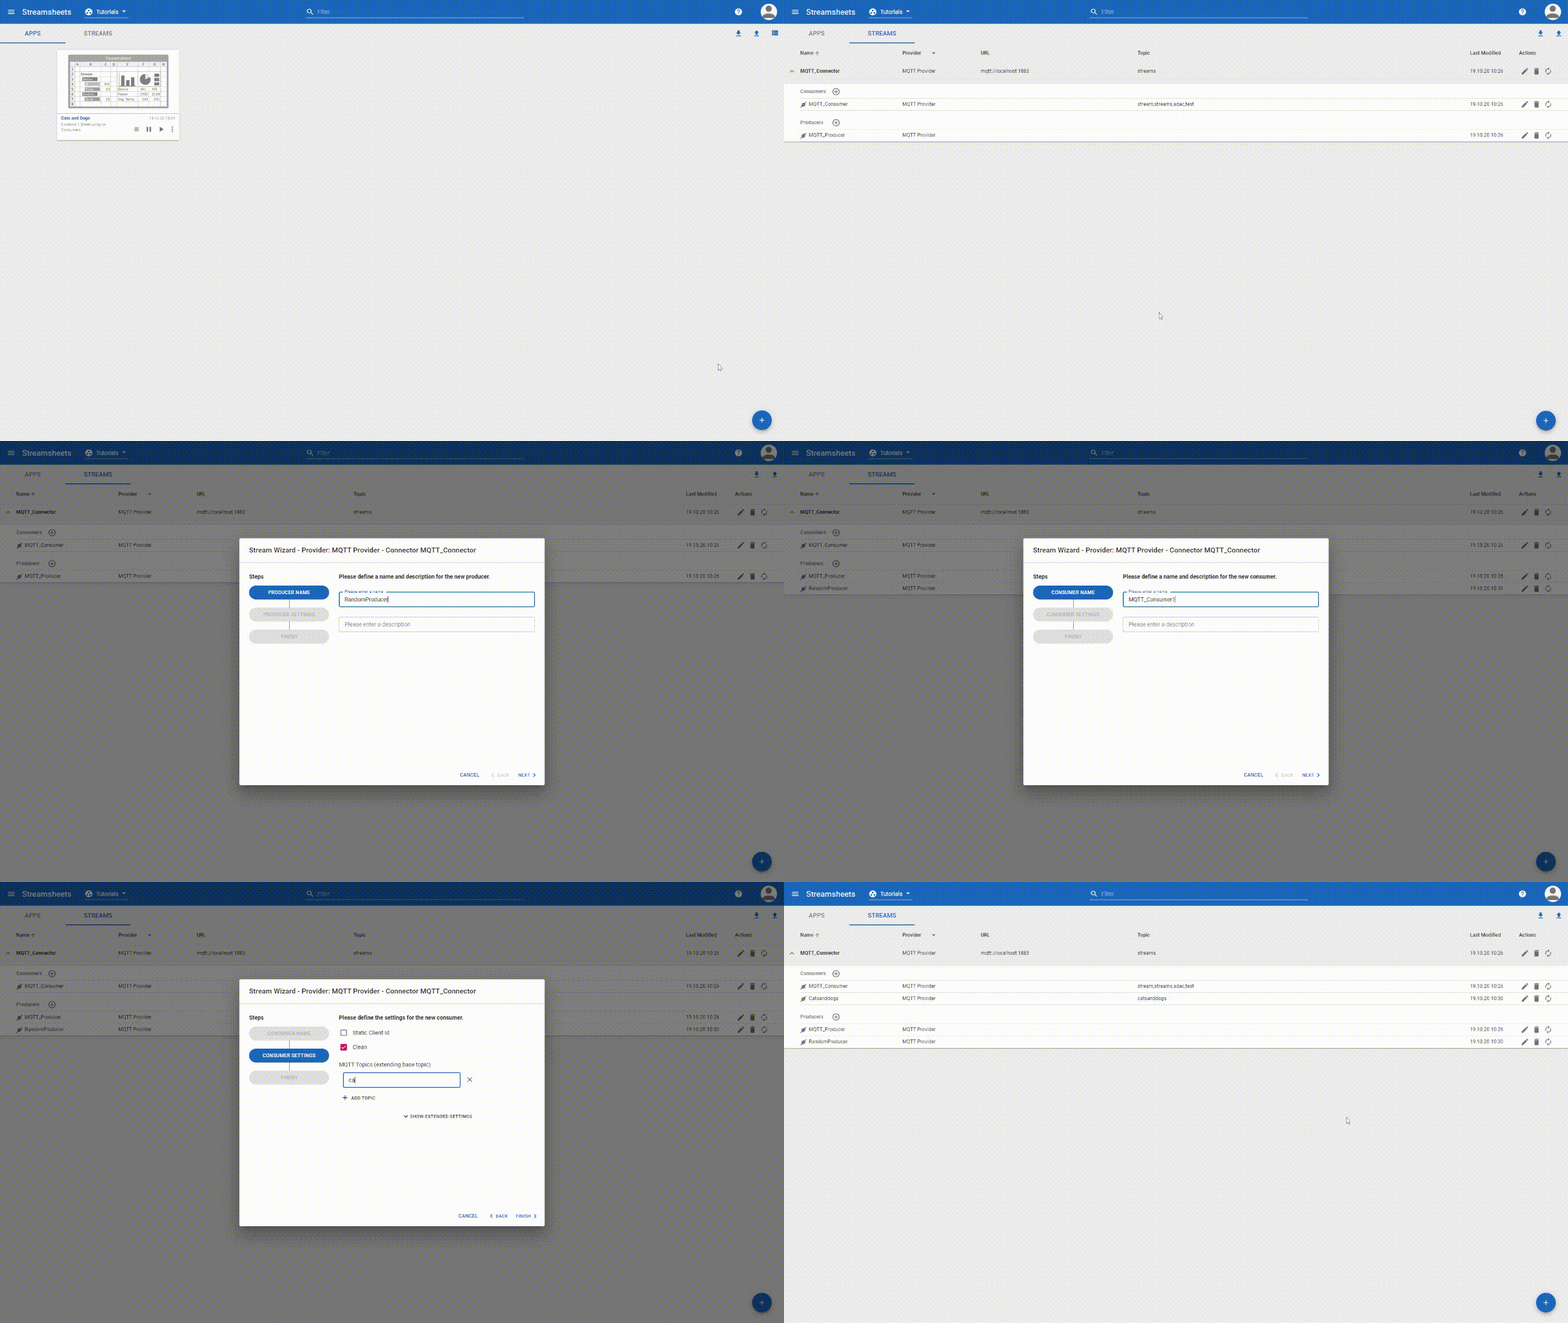
The "base topic" in the MQTT Connector defines the top level of the topic structure you are working with. E.g. a Consumer listening to the topic "catsanddogs" really listens to <basetopic>/catsanddogs. The "base topic" is optional.
|
Step 4: Produce a Message stream
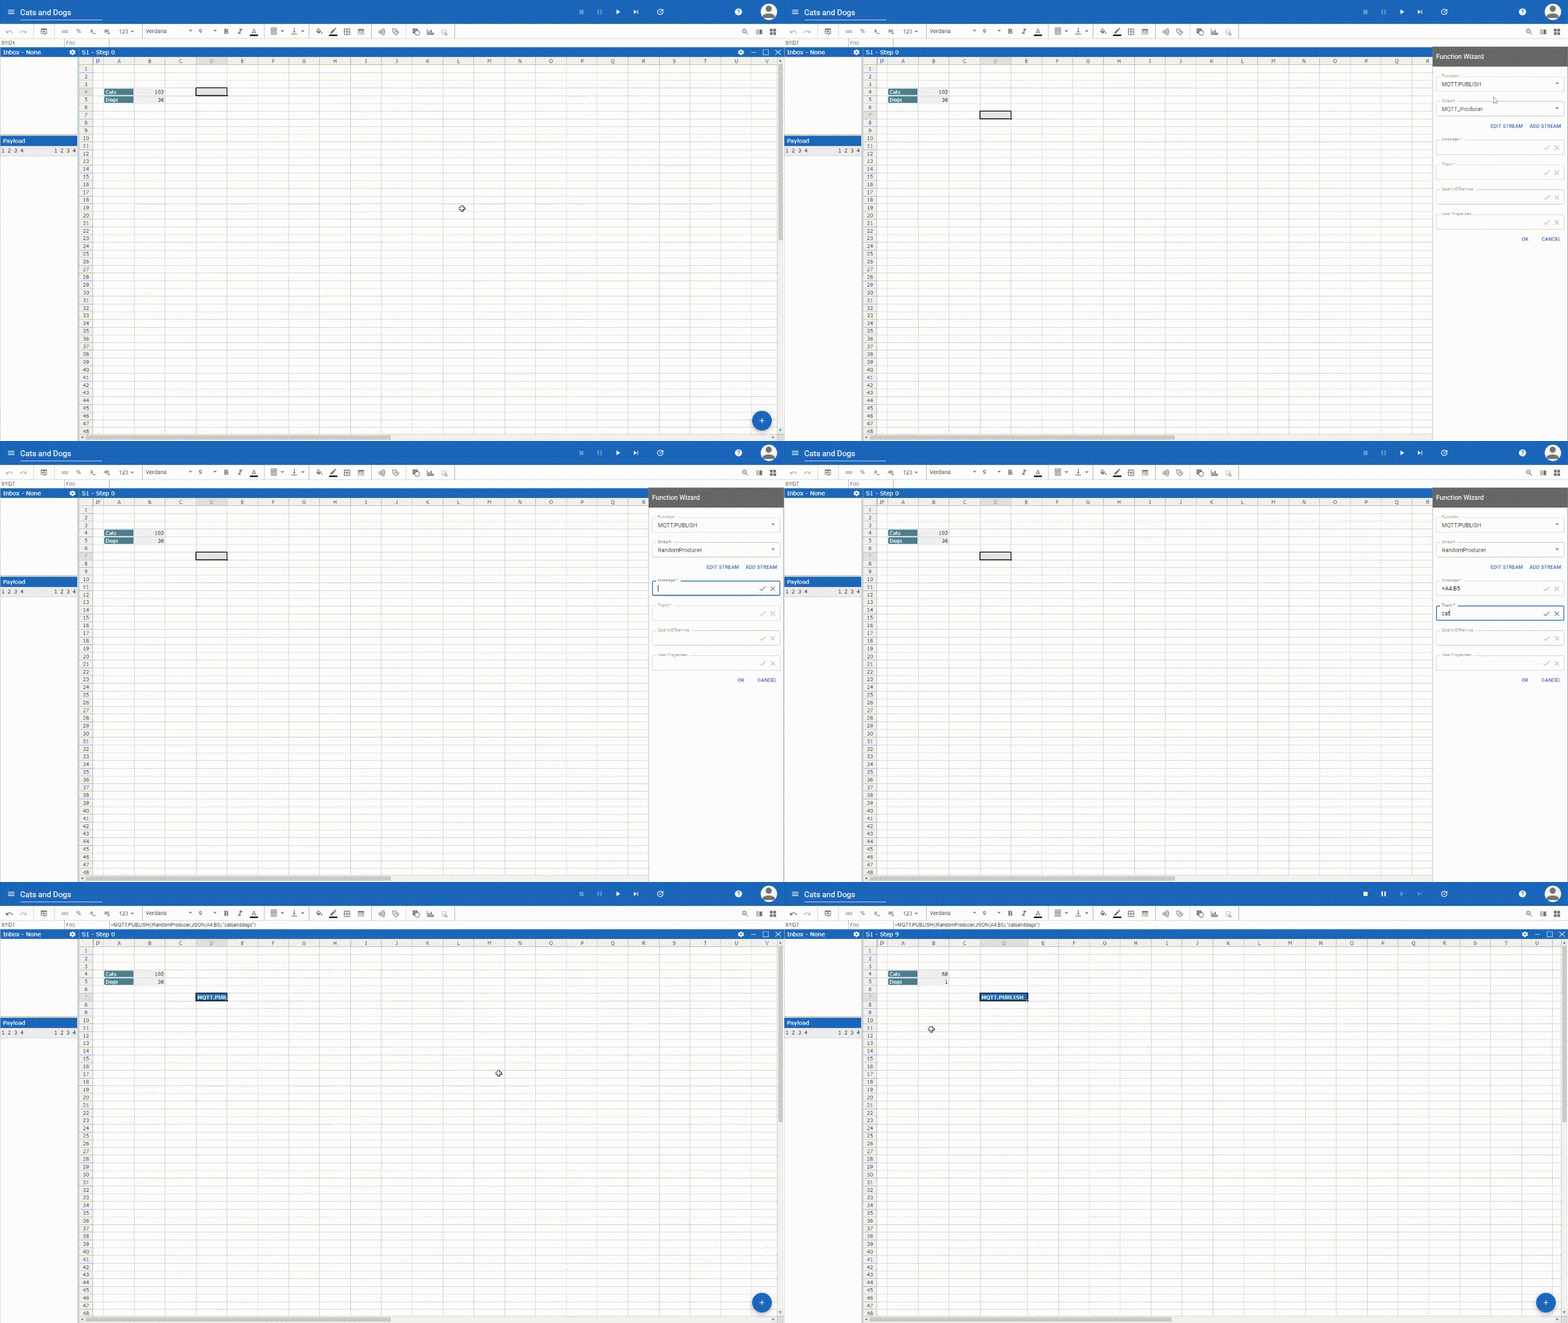
Now, we switch back to our App. Should you have closed the tab, just go
to the dashboard and open it again.
To send the created JSON Range, we select an empty cell beneath the
range and click “Insert Stream Function” in the toolbar. Choose
MQTT.PUBLISH and as Stream the Producer you just
created. The message parameter should already be prefilled referencing
to the JSON Range above. If that is not the case, select the JSON range.
To complete MQTT.PUBLISH enter the MQTT topic you listed in the
Consumer, possibly “catsanddogs”, and click OK. Then, start the App by
clicking “Play” in the blue bar on the top.
Streamsheets calculate from left to right and from top to bottom. This means, first, row 1 is calculated from left to right, then, row 2 followed by row 3 … until the end of the sheet is reached. As a consequence, you typically place a stream function behind the cells you want to send/produce. Placing the stream function before these cells will send the values of the previous calculation step.
Step 5: Consume a data stream
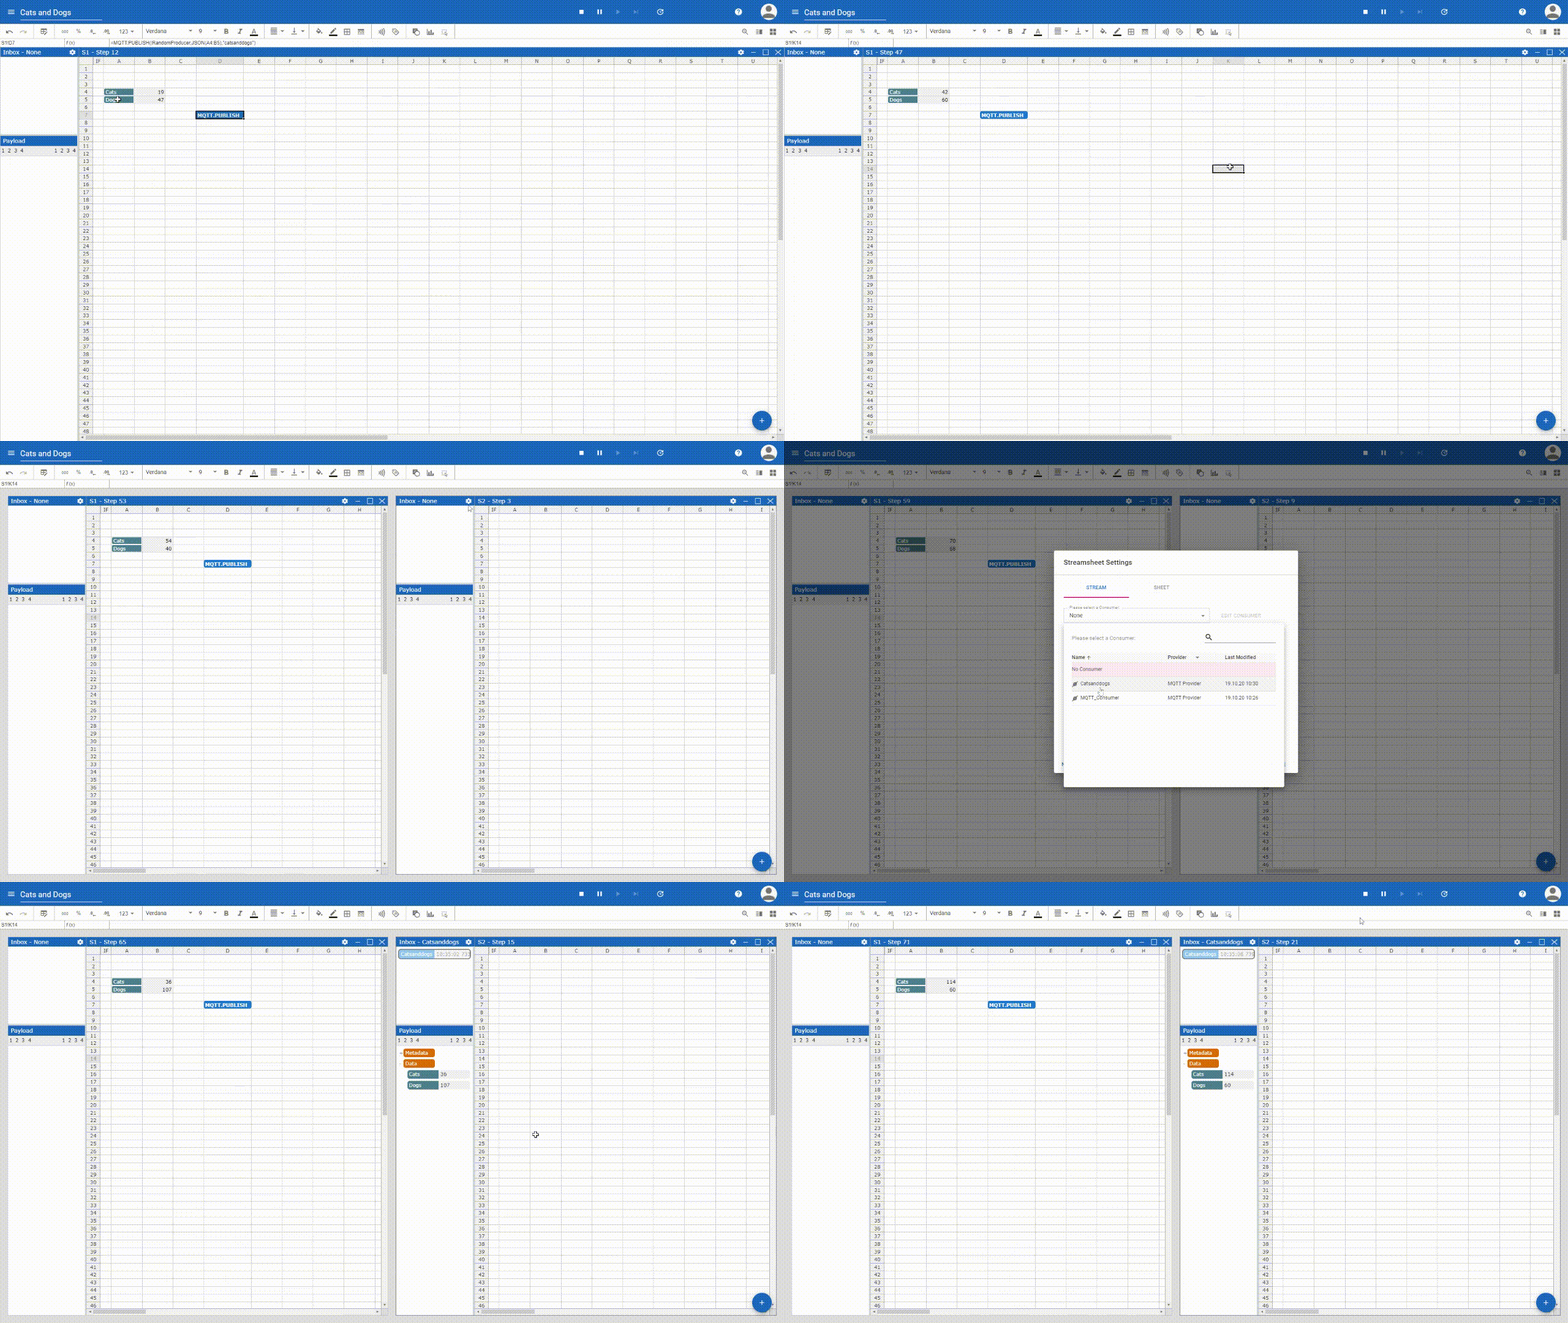
The easiest way to link an input data stream to a Streamsheet is to connect a Consumer to its Inbox. Let´s take this last step! Create another Streamsheet in this App by clicking the “plus” icon in the bottom-right corner. In the new Streamsheet look to the top-left where it says “Inbox”. Next to it is a cogwheel which takes you to the Inbox Settings. Select the Consumer you created before and change the calculation mode to “On Message Arrival”. In this mode a Streamsheet is only calculated when messages arrive in its Inbox and not in certain intervals.
Done?
Great! You just set up connections to the local MQTT broker and created an App which produces as well as consumes MQTT data streams.
Messages should be arriving in the Inbox of the second Streamsheet. If that is not the case, check whether your App is running (on “Play”), that your first Streamsheet has the calculation mode “Continuously” and that the topic in MQTT.PUBLISH() is the same as in the Consumer.
Optional Step: Ideas on what to do next
As mentioned in the beginning, this example serves as a quick
introduction.
Hence, why not extend this Streamsheet model a little? By dragging and
dropping data points which you receive in the Inbox into the grid, you
create a direct link between data stream and the spreadsheet world.
Consequently, you can start processing data and build logic with
spreadsheet formulas, e.g. to calculate KPIs, create dynamic dashboards
and build decision engines.
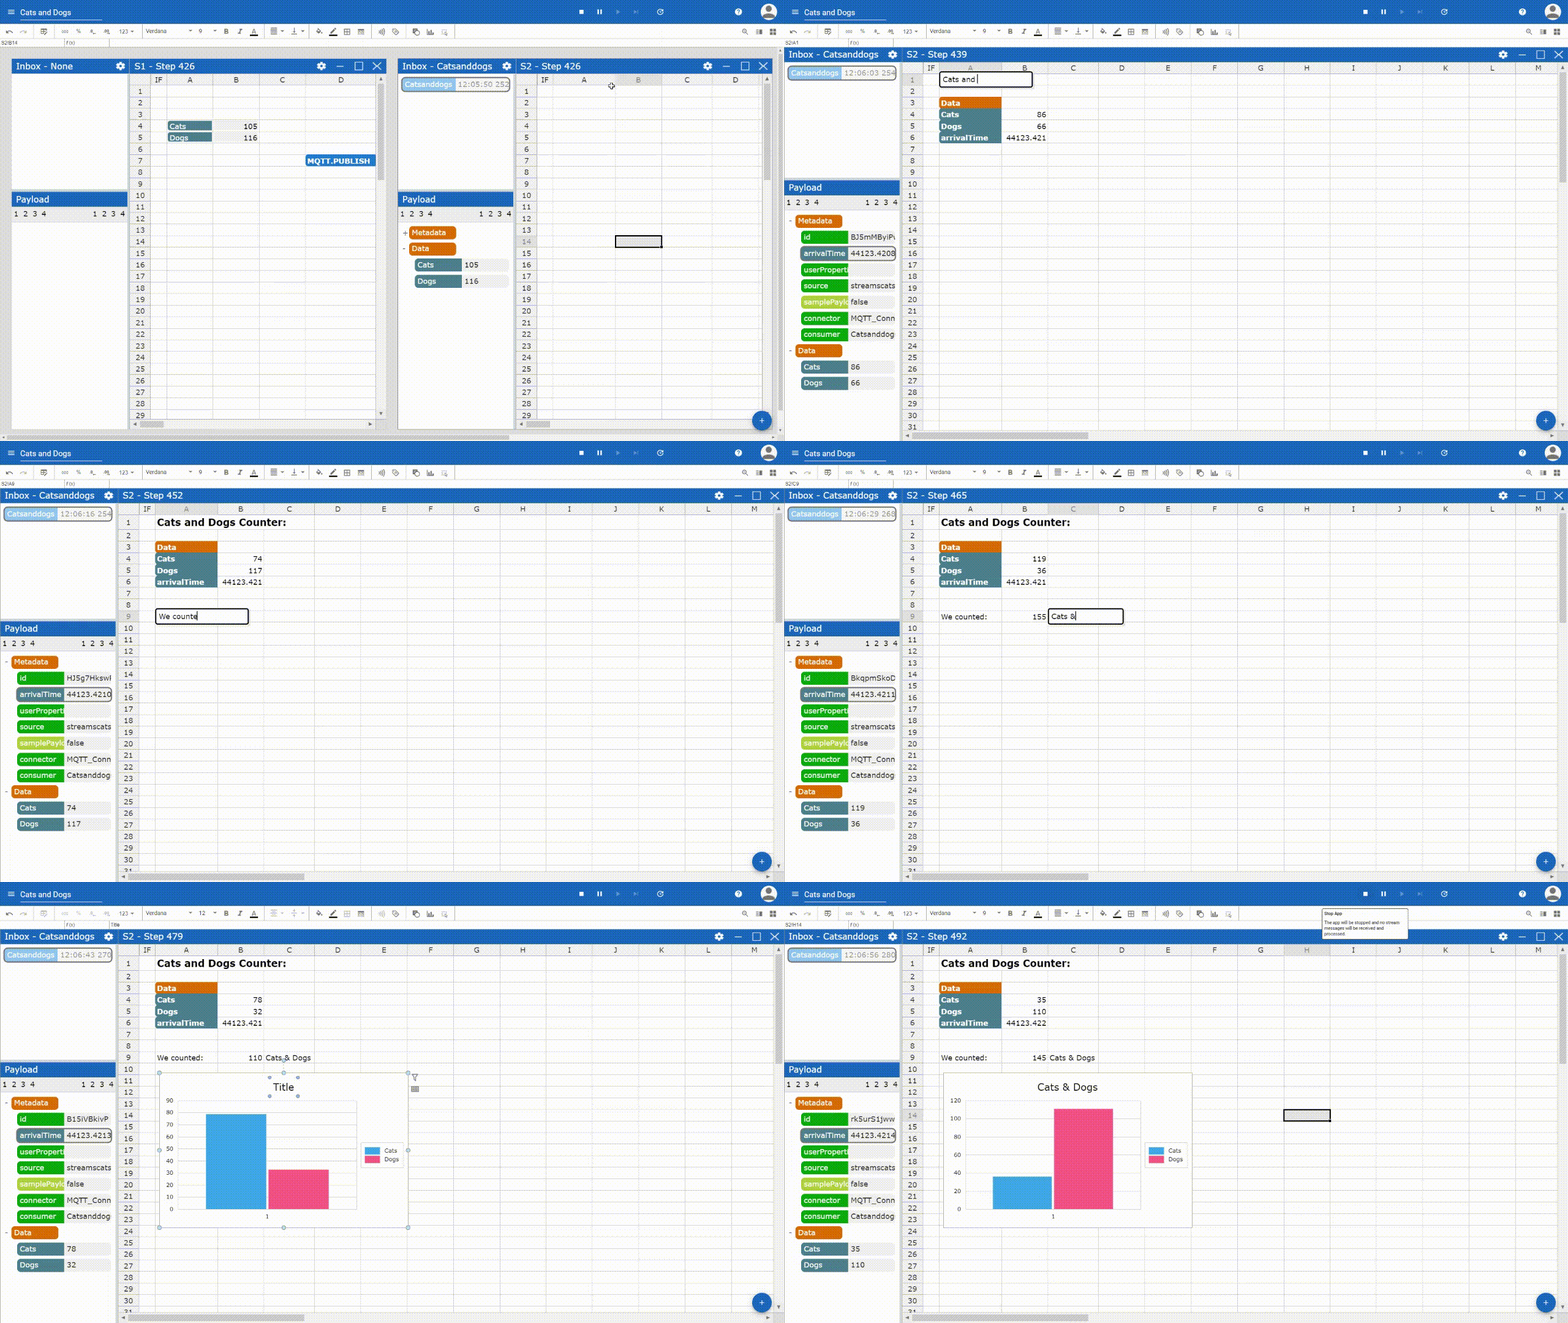
You will notice that you are working “live” on the message stream as incoming data is immediately transferred to the grid and formulas change their results accordingly. Additionally, you always see what the current result in each cell is. Remember: with every calculation step the whole logic is recalculated and, therefore, all conditions are reconsidered and based upon these, decisions can be taken. For instance, you could send messages to an additional MQTT topic or a slack channel but only if a certain threshold is met.
Further, sending data from one Streamsheet or App to another is useful when building larger models, however, typically you want to set up connections (Streams) to something outside of Streamsheets, too. Hence, why not set up a new Connector to get your Streamsheets communicating with the outside world?