ARRAY
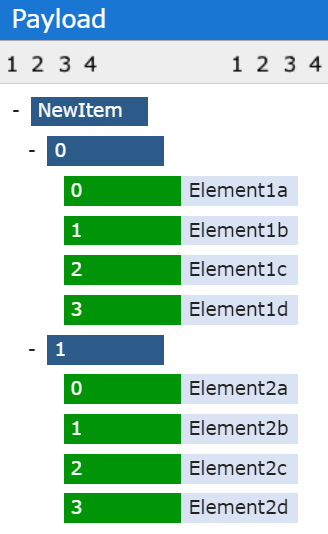
This function can be used to efficiently add array items to a message. Creates a JSON array entry using the given keys and values. If the range has one row or column, one array entry for each cell is created. If there are two columns or rows, a nested array (array containing a subarray) will be created. Note that if both nest and flat parameters are set to true one can use range instead.
Syntax
=ARRAY(Range, [Nest], [Flat])
Arguments
| Name | Type | Description |
|---|---|---|
| Range | Range | Source Range to retrieve data from |
| Nest (optional) | Boolean | Direction on how to nest items, if range has more than one row or column. FALSE to nest by column and TRUE to nest by row. Default is TRUE. |
| Flat (optional) | Boolean | If this Argument is supplied (any value works!) the returned Array is always nested, even if only one row or column is specified. If Argument is missing than the returned array is only nested if there are more than one row or column. |
Return
| Type | Description |
|---|---|
| String | Comma separated list of array items. |
Examples
| A | B | C | D | E | |
|---|---|---|---|---|---|
| 1 | Element1a | Element2a | Nest | Nest | |
| 2 | Element1b | Element2b | FALSE | FALSE | |
| 3 | Element1c | Element2c | Flat | Flat | |
| 4 | Element1d | Element2d | empty | TRUE |
| Formula | Result | Comment |
|---|---|---|
|  | Appending an array to a message. Since Nest is set to FALSE, the array items are created by columns leading to two array entries. The two entries contain the elements from the rows top to bottom. The message content will look as follows |
| Example usage of the nested parameter. | |
| Example usage of the nested parameter. |
tip
If you want to create an Outbox array step by step, you can use "-1" as last outbox data path to automatically add a new array element to the existing outbox message. =WRITE(OUTBOXDATA("Message";"data";-1);JSON(B1:C5);)